Shiny dynamic tabs
This is a simple shiny app that demonstrates dynamic shiny tabs. Each tab contains a shiny module which returns a series of data parameters and tabs can be added and removed. In one use-case this construct was used in three higher level tabs, returning a complex, nested structure.
Code is available at: https://github.com/harveyl888/shiny_dynamic_tabs
The concept is fairly simple - upon start up a tabsetPanel is built with a button prepended before the first tab. When clicked, this button adds a new tab containing a shiny module (the tab also contains a close button). The shiny module returns a series of data and these data, from all tabs, are stored in a reaciveValues list (rv$return_data). As tabs are added, deleted or their content changed, the contents of rv$return_data updates.
tabsetPanel code
The code below builds the tabsetPanel. Upon execution, rv$dataset_count is incremented from 0 to 1, dataset_name is set to dataset_1 and added to the rv$dataset_names list, and rv$trigger_add_data_button is changed from FALSE to TRUE. In addition, the first tab is created, containing a shiny module which returns data to rv$return_data. The line:
1rv$return_data[[dataset_name]] <<- mod_data(id = dataset_name, datasetname = dataset_name)
ensures that the shiny module returns data to a named list using the tab name itself as the component name.
 1  ## tabs
 2  output$ui_tabs <- renderUI({
 3    isolate({
 4      rv$dataset_count <- rv$dataset_count + 1
 5      dataset_name <- paste0("dataset_", rv$dataset_count)
 6      rv$dataset_names[[length(rv$dataset_names) + 1]] <- dataset_name
 7      rv$return_data[[dataset_name]] <<- mod_data(id = dataset_name, datasetname = dataset_name)
 8      rv$trigger_add_data_button <- TRUE
 9    })
10    tabsetPanel(id = "tab_data",
11                tabPanel(title = tab_title(dataset_name), value = dataset_name, mod_data_UI(dataset_name)))
12  })
Add Button to tabsetPanel
This observeEvent code is run when rv$trigger_add_data_button is set to TRUE. It runs a short javascript function (addbutton) to add a button to the tabsetPanel. The button is given the id add_data and an observeEvent is added which runs the function add_dataset() when the button is clicked.
Here is the R code:
 1  ## add a button to the tabPanel
 2  observeEvent(rv$trigger_add_data_button, {
 3    if (rv$trigger_add_data_button) {
 4      rv$trigger_add_data_button <- FALSE
 5      shinyjs::delay(100, session$sendCustomMessage(type = "addbutton", list(id = "tab_data", trigger = "add_data")))
 6      tryCatch(o_data$destroy(),
 7               error = function(e) NULL)
 8      o_data <<- observeEvent(input$add_data, {
 9        add_dataset()
10      }, ignoreInit = TRUE)
11    }
12  }, once = FALSE)
and here is the javascript function.
1Shiny.addCustomMessageHandler('addbutton', function(message) {
2  var button = "<li class='list_button'><button type='button' class='btn btn-success' onclick='trigger_shiny(\"" + message.trigger + "\")'><i class='fa fa-plus'></i></button></li>";
3  $("#" + message.id).first().prepend(button);
4});
5
6function trigger_shiny(trigger, value = 1) {
7  Shiny.setInputValue(trigger, value, {priority: "event"});
8}
Add a new tab with data
The add_dataset function is run whenever the button in the tabsetPanel is clicked. This function adds a new tab containing a shiny module. It is very similar to the tabsetPanel code
1  ## function to add a new dataset
2  add_dataset <- function() {
3    rv$dataset_count <- rv$dataset_count + 1
4    dataset_name <- paste0("dataset_", rv$dataset_count)
5    rv$dataset_names[[length(rv$dataset_names) + 1]] <- dataset_name
6    rv$return_data[[dataset_name]] <<- mod_data(id = dataset_name, datasetname = dataset_name)
7    appendTab(inputId = "tab_data", tabPanel(title = tab_title(dataset_name), value = dataset_name, mod_data_UI(dataset_name)))
8  }
Creating a new tab
Finally, the function below, builds a title for a tab including a close button.
1  ## tab title with close button
2  tab_title <- function(name, type = "data") {
3    tags$span(
4      name,
5      tags$span(icon("times"),
6                style = "margin-left: 5px;",
7                onclick = paste0("Shiny.setInputValue(\"", paste0("remove_", type, "_tab"), "\", \"", name, "\", {priority: \"event\"})"))
8    )
9  }
When the close icon is clicked the following observeEvent is triggered, removing the tab and updating rv$dataset_names, a list of the names of the current tabs.
1  ## remove a dataset
2  observeEvent(input$remove_data_tab, {
3    removeTab(inputId = "tab_data", target = input$remove_data_tab)
4    isolate({rv$dataset_names <- rv$dataset_names[!rv$dataset_names == input$remove_data_tab]})
5  })
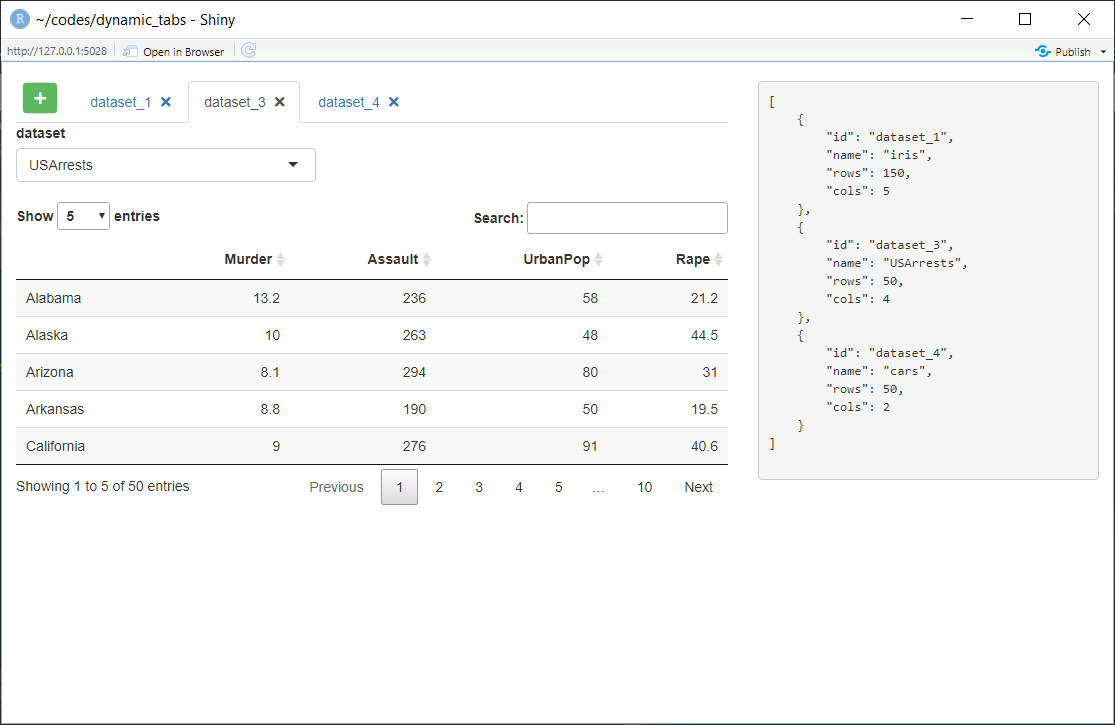
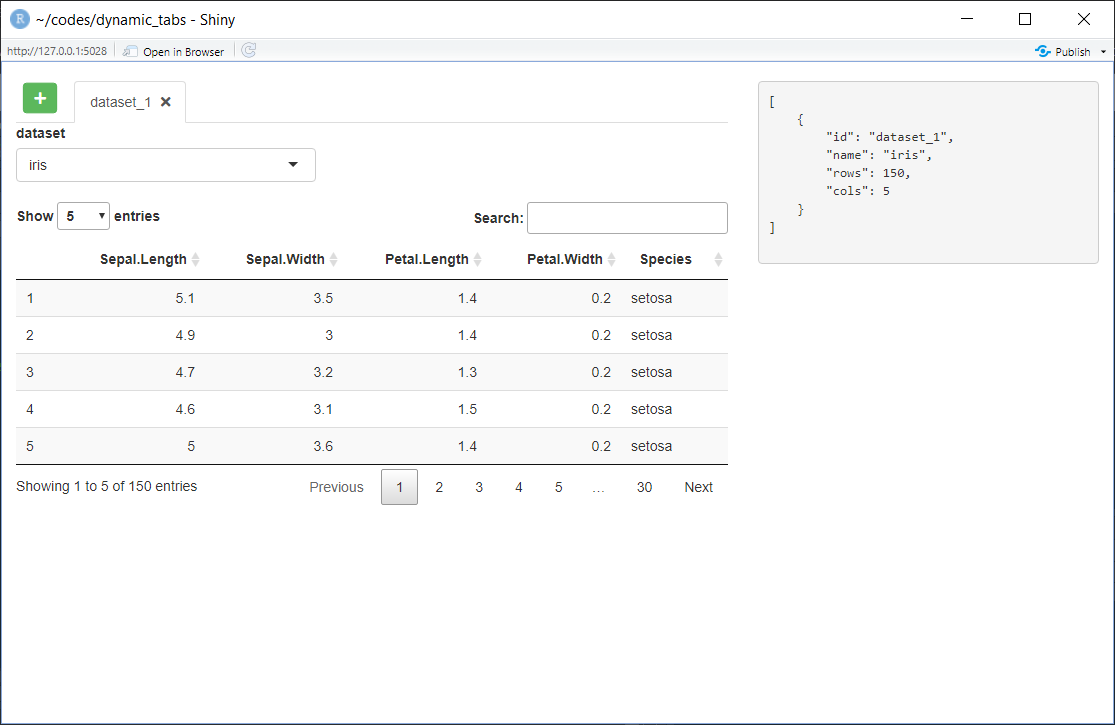
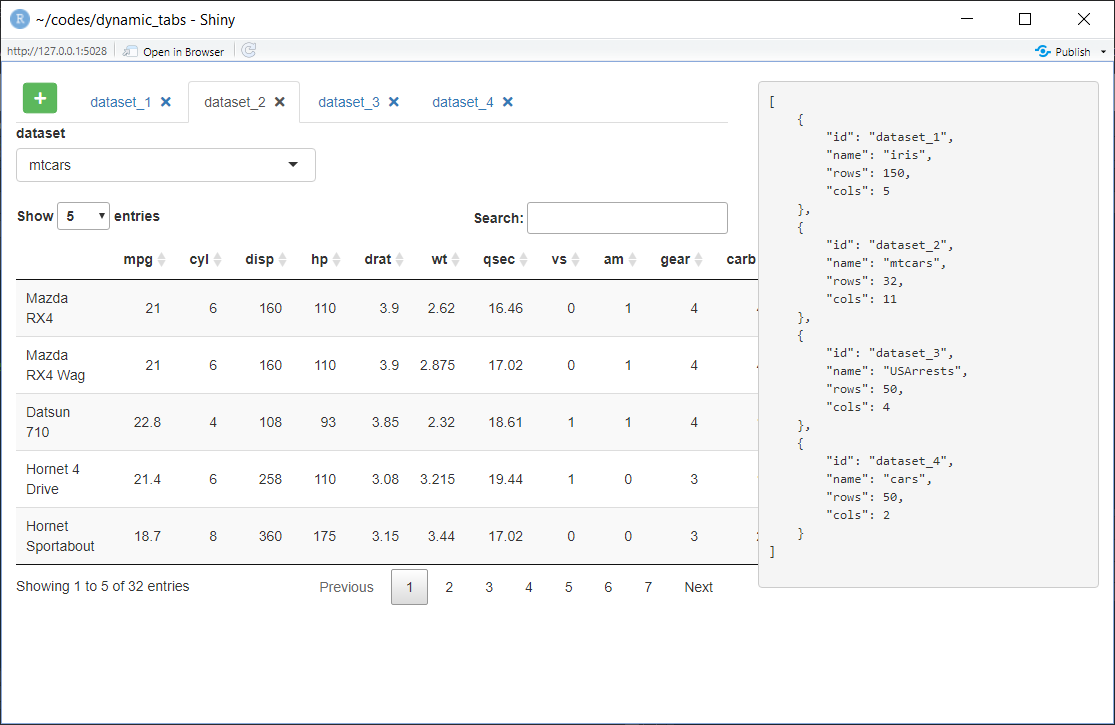
Screen Captures
Upon start up, the tabPanel is built with a button and a single tab. Data returned is printed to the right of the tabPanel.
Adding additional tabs and changing their content updates the returned data.
Removing tab #2 updates the returned data.